
DIY Home Decor
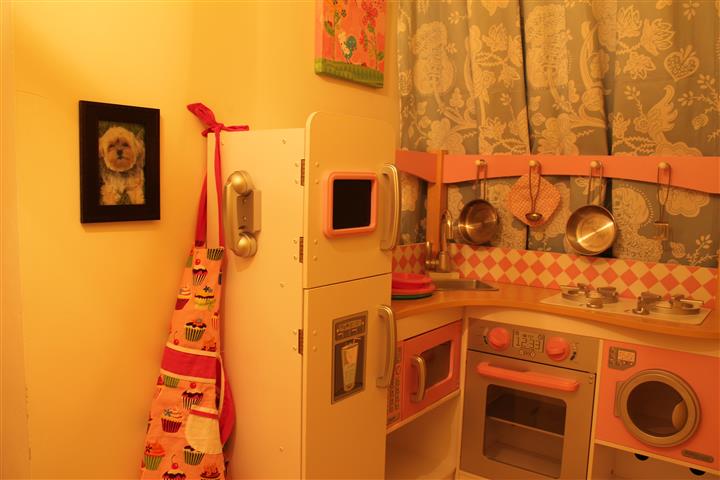
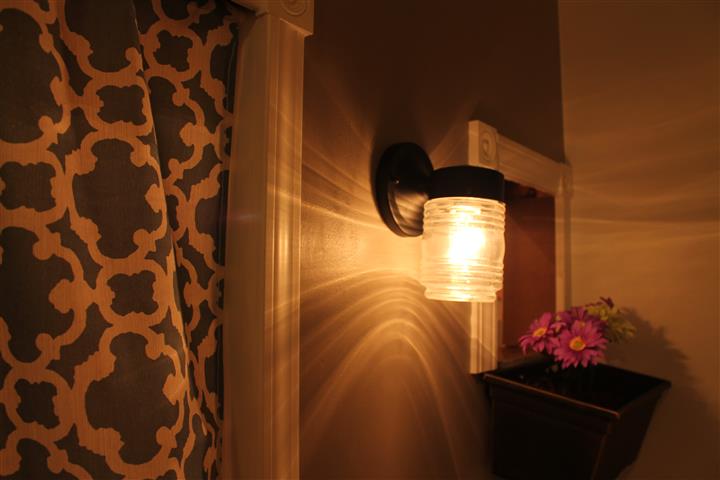
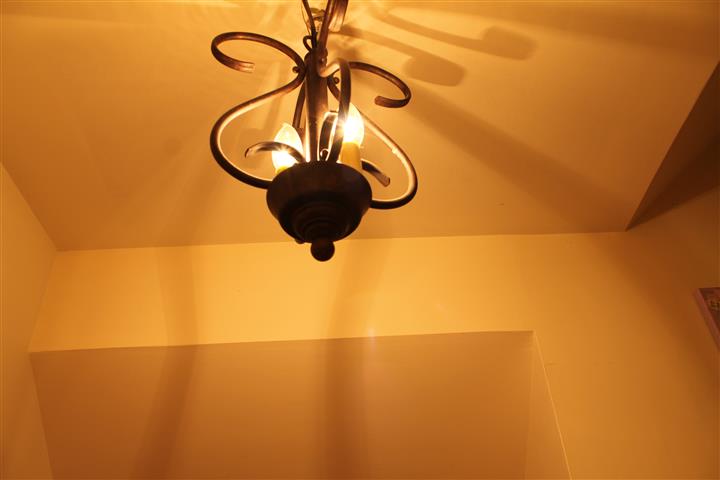
DIY Playhouse
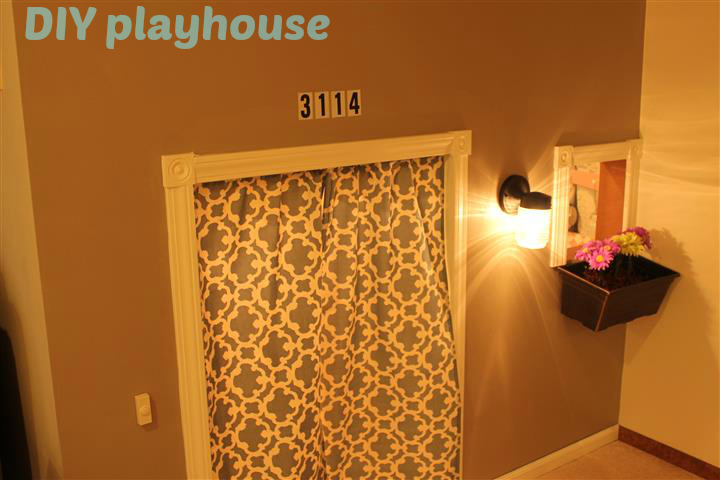
It started with a hole in the wall. Actually, there were two. We had a small storage area under the stairs that we weren’t using, and a daughter who needed a spot to play, so we grabbed our hammer and went to work.
After framing out the doorway, we installed two lights; a porch light ($8 at homedepot.com) and a small chandelier ($15 on craigslist). Then, my amazing husband replaced and repaired the drywall. While I don’t
think he should quit his day job, I do think it looks fantastic! I framed the window with hardboard, which is super cheap and smooth, so it’s easy to wipe clean. We then added trim and decorative detail to
the door and window, painted everything using leftover paint from other rooms and projects, and laid down some carpeting from when the previous owners had finished part of the basement. Overall, this was a fairly
inexpensive project, and we’re really happy with the results. More importantly, our daughter loves it!
Repurposing Old Picture Frames
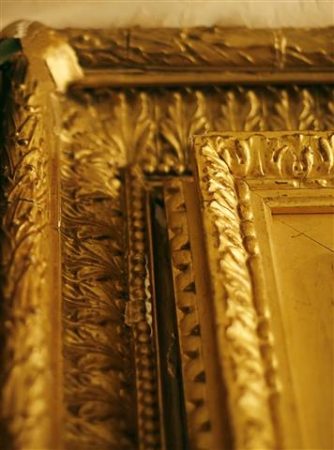
When we moved into our new house last year, we made a lot of quick decisions about what to keep and what to toss. Something my husband and I disagreed about were these old picture frames. They were brassy in color, and some no longer had the glass in them. I told him I wanted to paint them a different color and use them in the new house, but he was on a minimalist mission to throw out anything we weren’t currently using. Since I also knew our new house would have more storage space, I talked him into letting me keep my project frames. After repainting and organizing our daughter’s room, I decided what I wanted to do with the frames finally.
My daughter, believe it or not, didn’t want a pink bedroom in our new house. When asked what colors she wanted in her bedroom, she said green and blue. I interpreted that by painting her room a greenish blue called Robin’s Egg Blue, and decorating with accents of bright white, ballet slipper pink, and touches of minty green. The longest wall in her room is where I put up the frames, with a fresh coat of kilz, a spray of white, then a laquer to give them just a touch of sheen. Instead of framing family pictures, I added a little whimsy with girly words, flowers, and birds to tie in the theme of her quilt, and also for a play on the color of her walls. Repurposing old picture frames is such a simple and completely free (if you happen to have the paint already, that is) DIY home decor project that anyone can do.
Updating Built In Bookcases
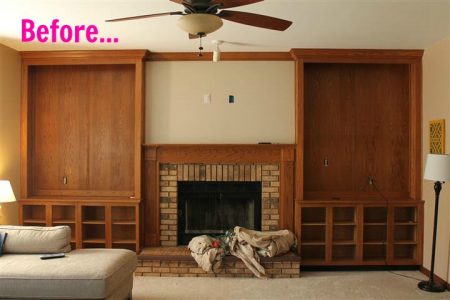
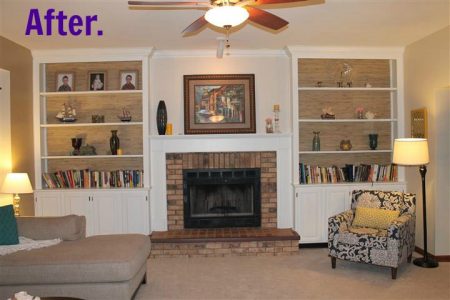
Hi friends! I have a confession. I hope that I’m not the only person that does this, but I’m really awesome at starting projects and really terrible at finishing them. The built-ins above have been mostly finished for months, but just recently did I put the finishing touches on the crown molding. This is how life goes, and I never estimate correctly how much time to allot for each project. I really think that if I were truly honest with myself (and my husband) about how much time and energy every job would take, we would never start anything. So you see, my optimism (cough: naivety) pays off in spades!
For this project, you will need:
- 1 wall of outdated, knotty, go-back-to-the-80’s-where-you-belong built-ins
- 1-2 gallons of paint in the color of your dreams. In my dreams, everything is clean and no one ever has chocolate on their grubby little fingers.
- Your choice of wallpaper and glue. Obviously, I like my wallpaper like my men; thick and difficult to work with.
- A sander, drop cloth, safety goggles, and a couple of dust masks.
- And finally, an abundance of time, patience, and wine.
Before beginning the built in bookcases transformation, I over-confidently decided that I would get the prep work done in one day, and the first coat of paint done by the second. If you’re laughing at this adorable burst of verve and idealism, it’s okay; I’ll assume you’ve done a project like this before. It took me the first two days to finish the prep work. Prepping is very important for this project, because if you have natural toned wood and are wanting to paint over, the wood likely has a coat or two of polyurethane, and possibly a stain as well. You’ll want to sand until the wood is completely natural and smooth. Sounds like a whole lot of work, right? Well, here’s that upper arm work out you’ve been looking for! You’re welcome!